|
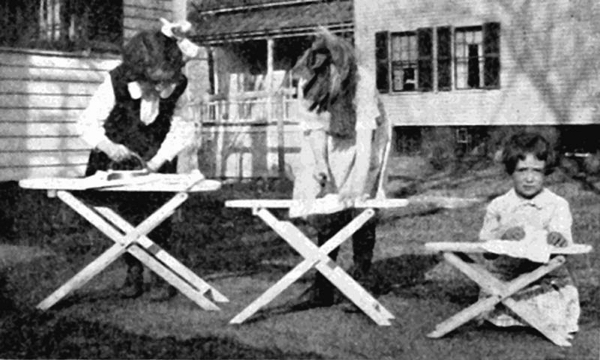
This ironing
board comes in three sizes for children, 3 years, 3 - 6
years, and 6 - 8 years old.
Three Year Old's Ironing Board
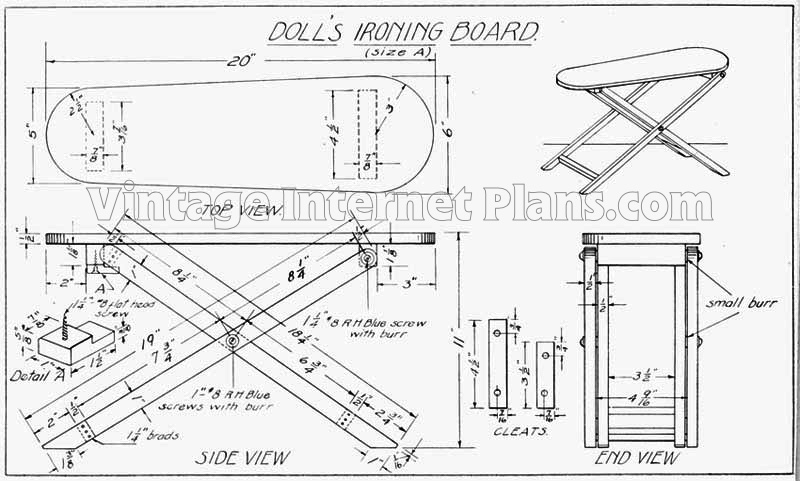
The first plan is for children about 3 years old and the
material is prepared as follows:
The top is first made of 1/2" lumber and is 6" wide and 20"
long. Set the dividers with a 3" radius and strike an arc
just touching the end and two sides of the board. Do the
same on the other end, using a 2-1/2" radius. Connect these
arcs with straight lines and saw and plane carefully just to
the lines all around.
Slightly round the upper edge of the surface which is to be
uppermost.
The legs are next cut to size, the two longer ones being
1/2" × 1" × 19" and the two shorter ones 1/2" × 1" ×
18-3/4".
One end of each is rounded by striking an arc with a 1-1/2"
radius, at the extreme end. The other ends of the legs are
cut off at an angle, as shown in the drawing.
Holes are bored in the rounded ends of the long legs, 1/2"
from the ends with a No. 3 bit. Another hole of similar size
is bored 8-1/4" from the one previously bored. These holes
are all 1/2" from the edges.
On the short legs the only holes necessary are bored 8-1/4"
from the rounded end.
The long legs are attached by screws to a cleat which itself
is screwed to the underside of the top of the board, as
shown. This cleat is 7/8" × 1-1/8" × 4-1/2" and is glued and
held to the top by 1-1/4" flat-head screws, two of them
being sufficient. These are countersunk.
The separating piece at the other end of the long legs is
1/2" × 1" × 4-9/16" and is held in place by 1-1/4" brads and
glue. It is attached 2" from the ends.
Two separating pieces are next made for the short legs, 1/2"
× 1" × 3-1/2", and these are attached in the same manner as
the piece between the long legs.
A cleat 7/8" × 1" × 3-7/16" is attached with glue and 1-1/2"
flat-head screws, 2" from the small end of the board. This
holds the short legs in position.
All pieces should be thoroughly sanded before being
assembled. No further finish is necessary.
Four to Six Year Old Ironing Board
The method of constructing this board is identical with the
method suggested forthe smaller style. The difference is in
the size of the pieces.
The top is 5/8" thick, 7-3/4" wide and 24-1/2" long.
The curved ends are struck with the dividers in the same way
as in the preceding problem.
The legs are next cut to dimension, the longer ones being
9/16" × 1-1/8" × 24", and the shorter 9/16" × 1-1/8" ×
22-1/2".
One end of each leg is rounded by setting the dividers at
9/16" and cutting to the line and cutting the opposite ends
at an angle, as shown in the drawing.
Bore holes with a No. 3 bit in the rounded ends of the long
legs, 5/8" from the ends and a similar hole is bored 9-1/2"
from the hole previously bored. These holes are all 9/16" in
from the edges.
On the short legs the only holes bored are made with the
same bit, 9-3/8" from the rounded ends.
The long legs are attached to a cleat by 1-1/2" No. 10
round-head blue screws, with washers under both the heads of
the screws and between the screws and the cleat.
The cleat is 7/8" × 1-1/8" × 5-7/8" and is glued and screwed
to the under side of the top with 1-1/2" No. 8 flat-head
screws.
These are countersunk.
The separating piece at the other end of the long legs is
3/8" × 1-1/8" × 5-15/16" and is held in place by 1-1/4"
brads and glue, and is attached 3" from the end.
Two separating pieces are next made for the short legs, 3/8"
× 1-1/8" × 4-1/2", and these are attached in the same way as
the piece between the longer legs.
A cleat 7/8" × 1-1/4" × 4-7/16" is attached with glue and
1-3/4" flat-head screws, 4" from the small end of the board.
This holds the short legs in position. Refer to the detail
on the drawing of the size A ironing board (Plate 22) for
the method of making the button which holds the board rigid.
All pieces should be thoroughly sanded before being
assembled.
No further finish is necessary.

Six to Eight Year Old Ironing Board
The method of constructing this size board is similar to
the other two types. (Plate 24.)
This size board is suitable for children from six to eight
years of age.
The top is made 3/4" thick, 9" wide and 30" long. The
dividers are set with a 4-1/2" radius and an arc is struck
to touch the end and two sides of the board. A similar arc
is struck at the opposite end with a 3-1/2" radius.
These arcs are connected with a straight line, and the
outline is cut with a saw and finally planed to the lines.
The curved ends can be cut with a turning saw and finished
with a chisel and file.
The upper edges are slightly rounded with a file and
sandpaper.
The legs are next cut to size, two being 3/4" × 1-1/4" ×
27-7/8", and the other two 3/4" × 1-1/4" × 29".
One end of each is rounded by striking an arc with a 5/8"
radius, at the extreme end. The other ends of the legs are
cut at an angle, as shown in the drawing.
Holes are bored in the rounded end of the short legs, 5/8"
from the ends, of a size that will take a 1-3/4" No. 10
round-head blue screw.
Another hole of similar size is bored 11" from this. These
holes are all 5/8" from the edges.
On the other two legs the only two holes necessary are bored
12-1/2" from the rounded ends.
The shorter legs are attached by screws to a cleat which
itself is screwed to the underside of the board, 4-1/2" from
the large end. This cleat is 1" × 1-1/4" × 6-3/4" and is
held in place with glue and 1-3/4" flat-head screws,
countersunk. Two of these screws are sufficient.
The separating piece at the other end of the legs is 3/4" ×
1-1/4" × 6-13/16", and is held in place by 1-1/2" brads and
glue, and is attached 3-1/2" from the ends.
Two separating pieces are next made for the long legs, 3/4"
× 1-1/4" × 5-1/4", and these are attached in the same manner
as the pieces between the other set of legs.
A cleat 1-1/8" × 1-3/8" × 5-3/16" is attached with glue and
2" flat-head screws, 5-1/2" from the small end of the board.
This holds the short legs in position.
The wood button, shown on the drawing for the Size A ironing
board (Plate 22), is attached to this cleat and prevents the
board from collapsing.
All pieces should be thoroughly sanded before being
assembled.
No further finish is necessary.

|