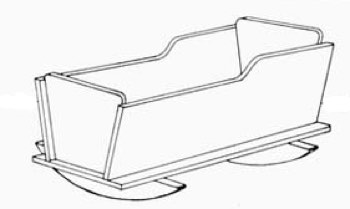
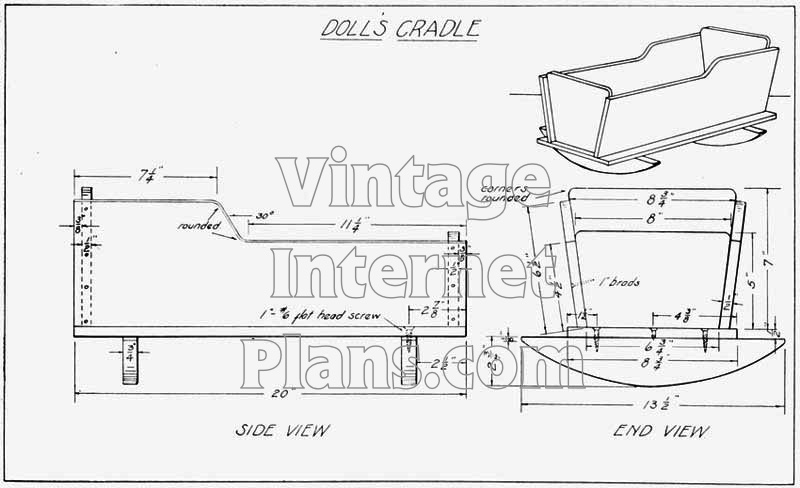
A cradle built according to plan is suitable for a doll sixteen or seventeen inches in length.
The two sides should be first made 1/2" × 6-1/2" × 20". These
are later beveled slightly on their lower edge to conform to the slope
of the head and foot board.
Measure from one end along the top edge
7-1/4" and from the other end 11-1/4". From this last end the width of
the side is cut down to 4-1/2", as far as the 11-1/4" measurement
previously made. Connect the point which is 7-1/4" from the left end
with the point which is 11-1/4" from the right end. This gives a slope
of approximately 30 degrees, as is shown in the side view. Slightly
round the corners, as indicated.
The head board is next made 1/2" × 7" × 8-3/4".
Measure in, on one of the long edges, an inch from either
corner, and from these points draw straight lines to the upper corners.
Cut carefully to this line. This makes the lower edge 6-3/4" long. The
upper corners are rounded, as shown.
The foot board is made in a similar manner, first cutting
it 1/2" × 5" × 8". Place the head and foot board together to see if they
exactly correspond. If not, plane or saw them while together so they
are exactly alike, except in height.
The four pieces so far completed may now be assembled, using glue and 1" brads.
See that this frame sets flat when placed on a level surface.
The base is next made 1/2" × 8-3/4" × 20". The two rockers are cut 3/4" × 2-3/4" × 13-1/2".
It is a good plan to cut a piece of paper the above size,
fold across the short way and sketch on the folded surface one-half the
rocker shape. When this has been done in a satisfactory manner it may be
unfolded, cut out and drawn on wood. The rocker ends have a slight
shoulder of 1/8", as shown. In sloping the rockers, get them alike and
make the curve such as will cause them to rock with a very slight
pressure.
Holes are bored with a small drill in the base, 2-1/2"
from the ends and 1-1/2" from the sides. A hole is also bored half way
between the two, as shown, and all are countersunk on the upper side.
Attach the rockers with glue and 1" No. 6 flat-head screws.
See that they project equally on the sides and are square with the edges.
Now nail the rocker base to the upper frame previously
made, using 1" brads and glue. Have the base project equally from the
upper frame on each side and come flush with the ends.
All pieces should have been carefully sanded, of course, before assembling.
The next, and last step is the final finish. If paint is to
be the finish, select the desired color and apply a priming and a
finish coat.
|